Skip to content

Lawn Mat

$597.18


FREE SHIPPING
SKU EG-GPM-HG-6.7X25

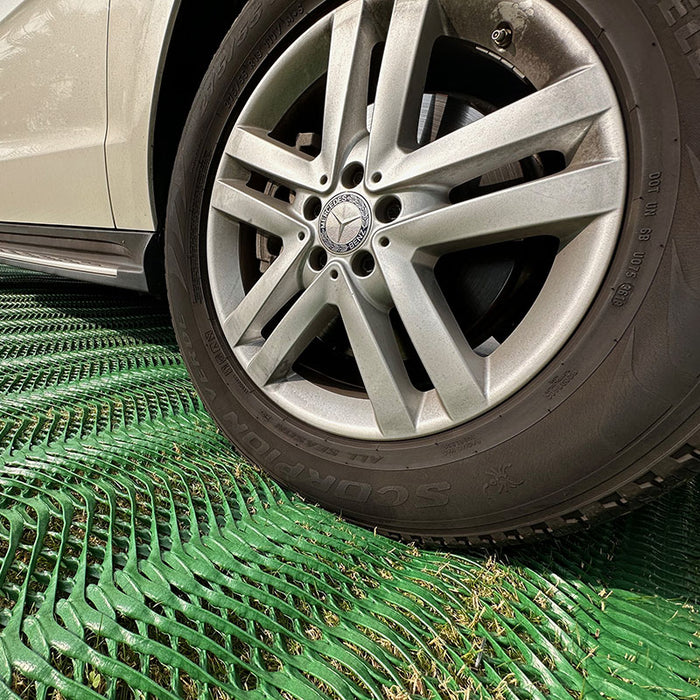
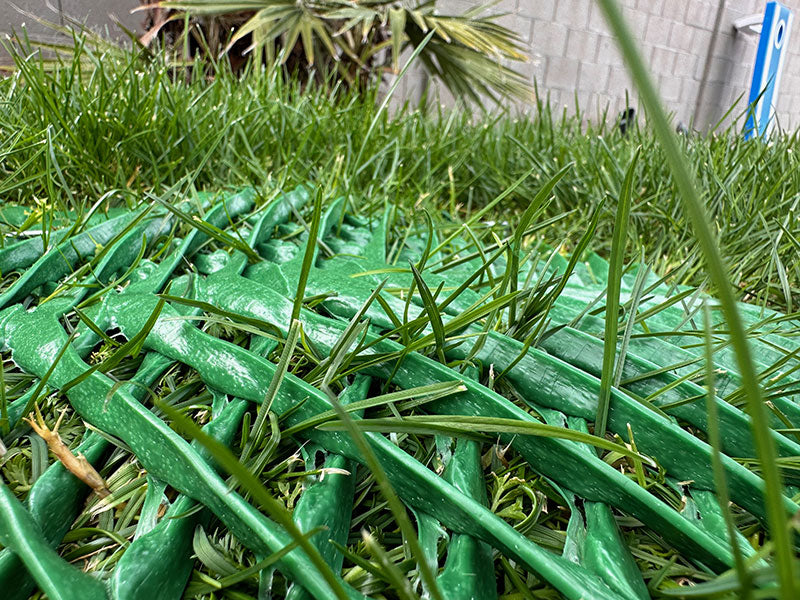
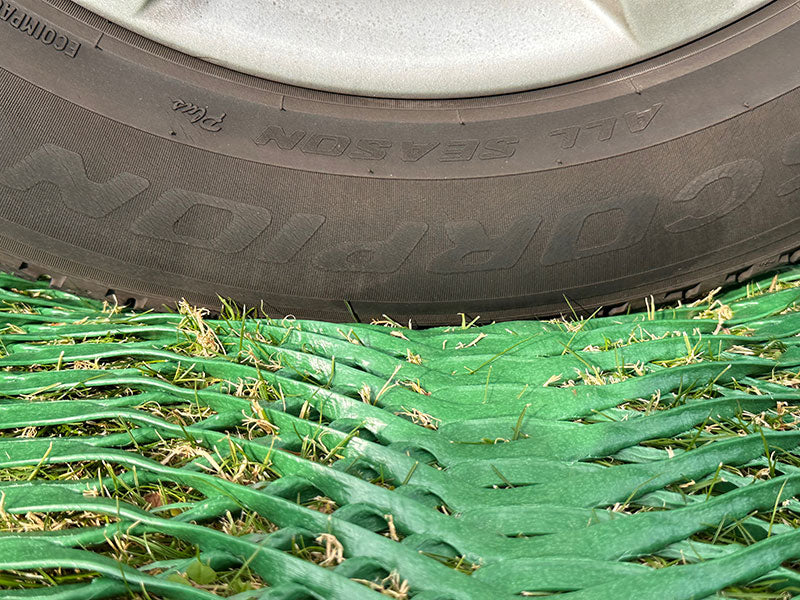
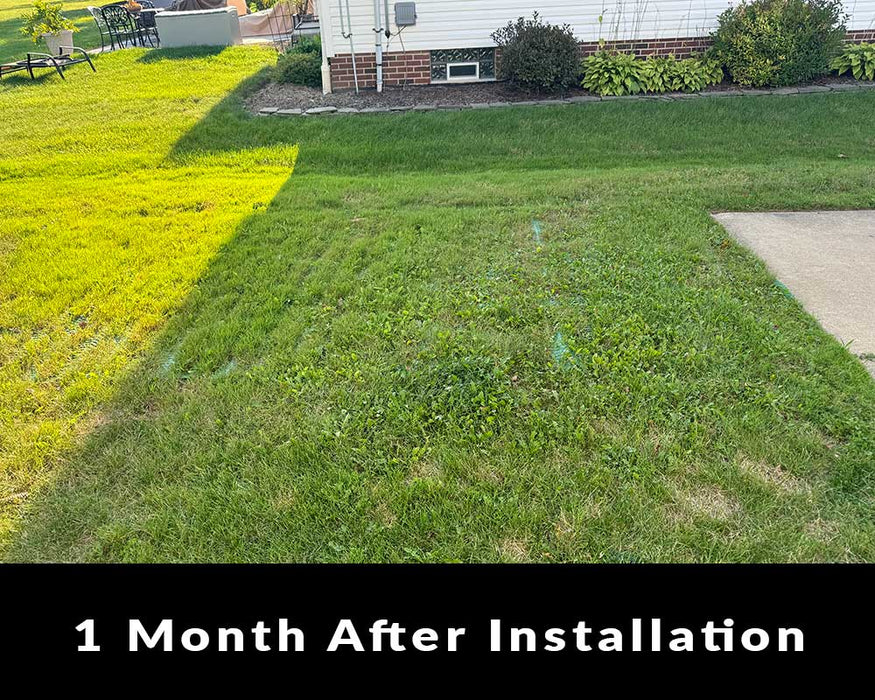
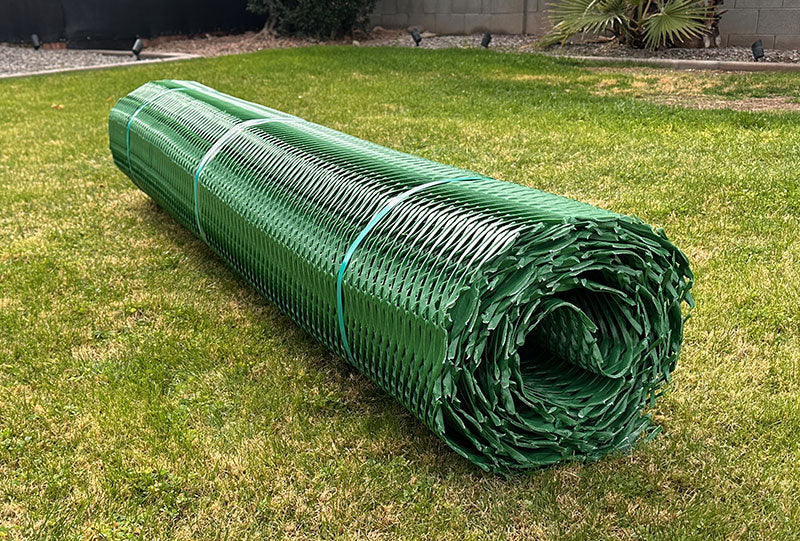
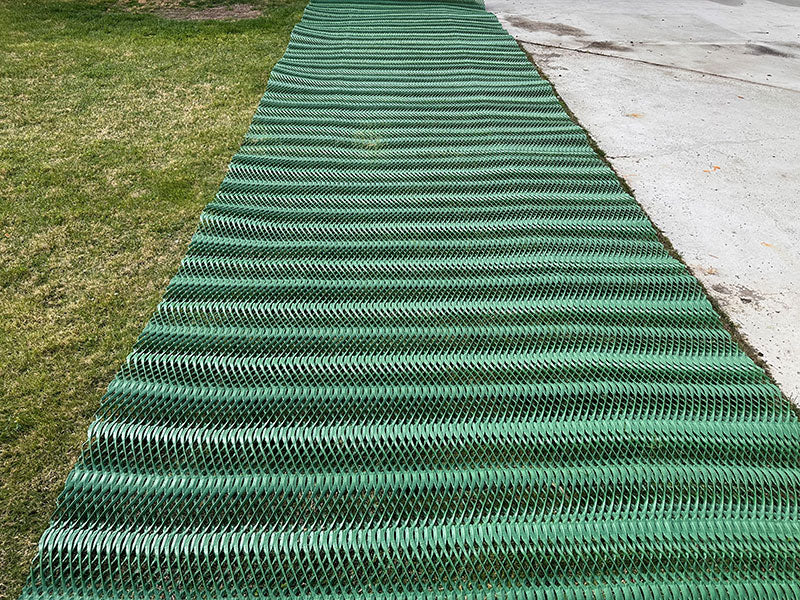
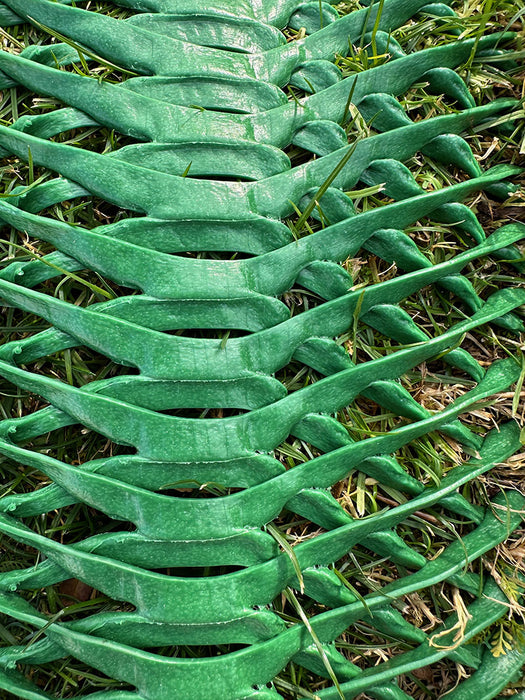
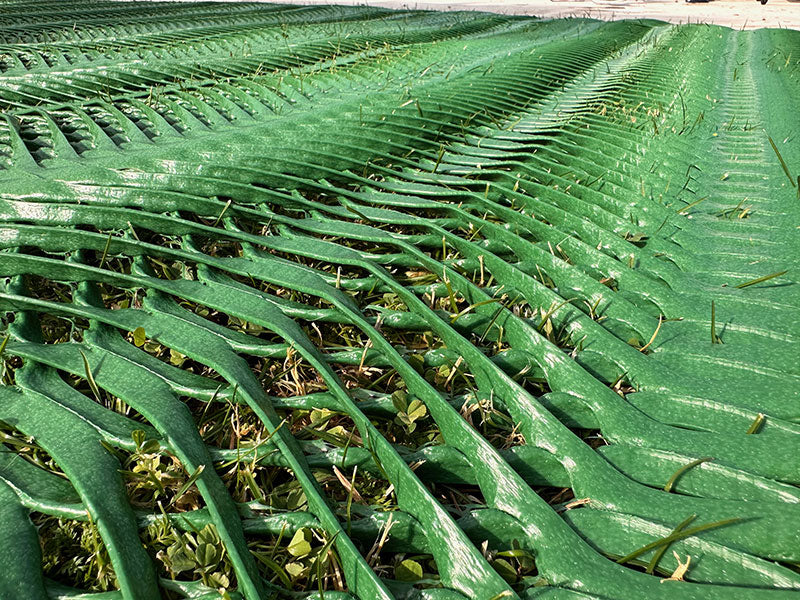
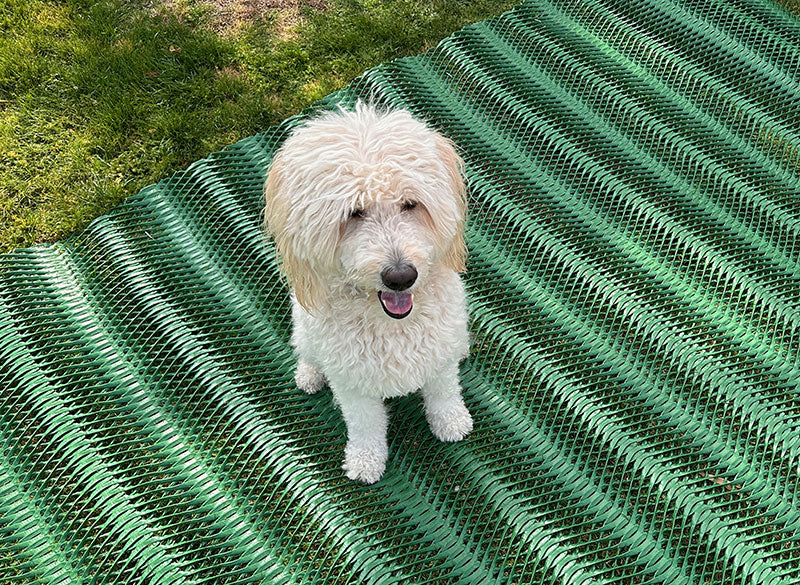
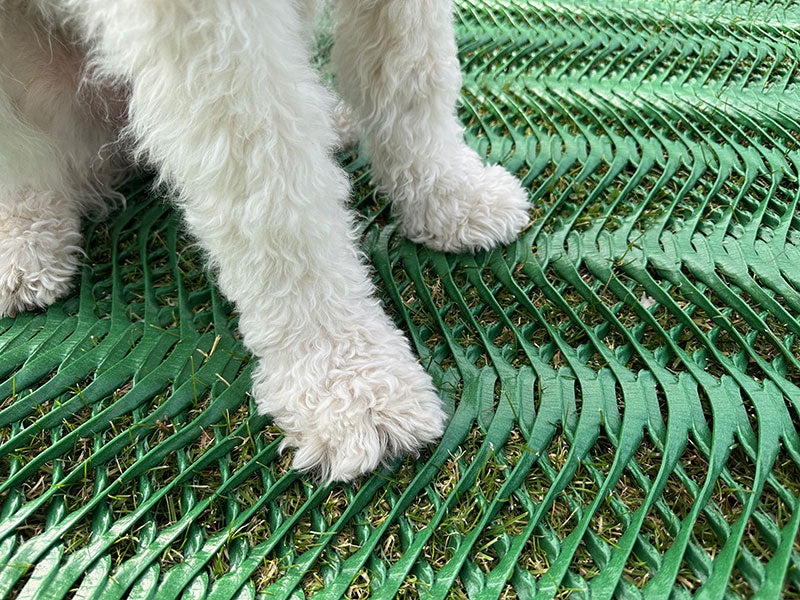
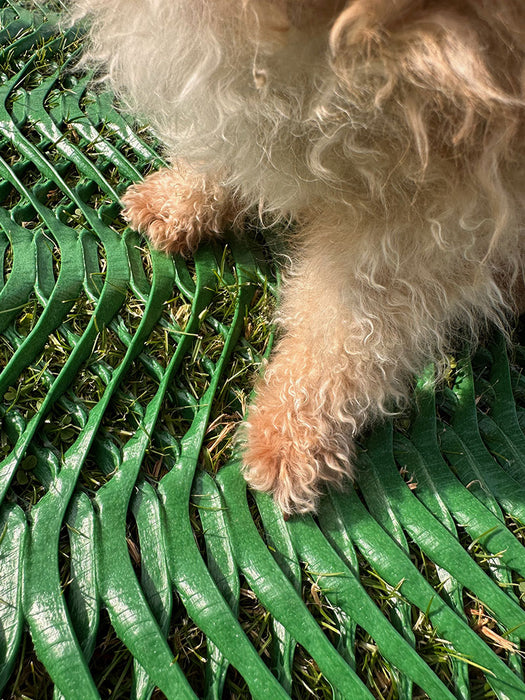
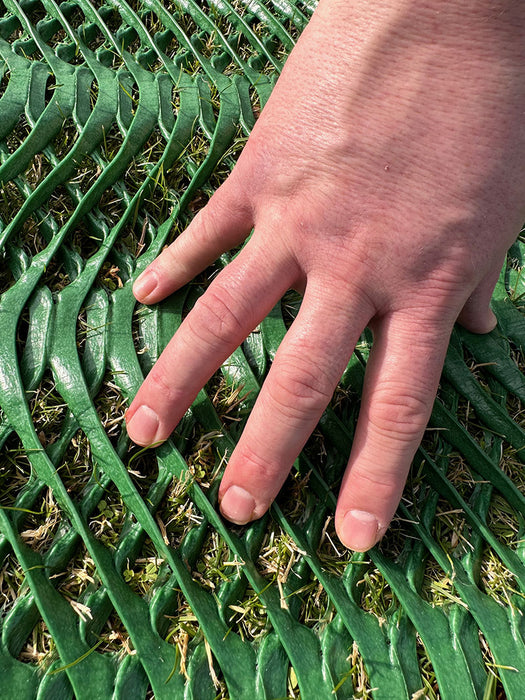
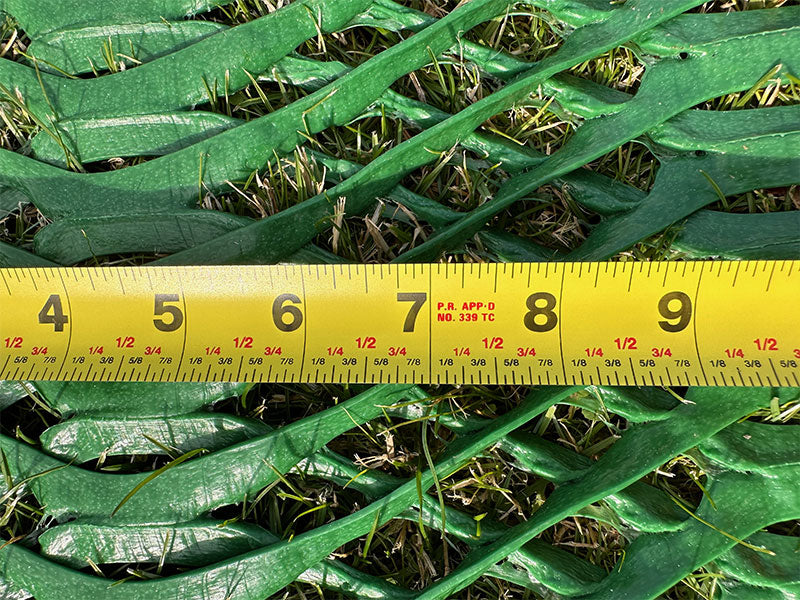
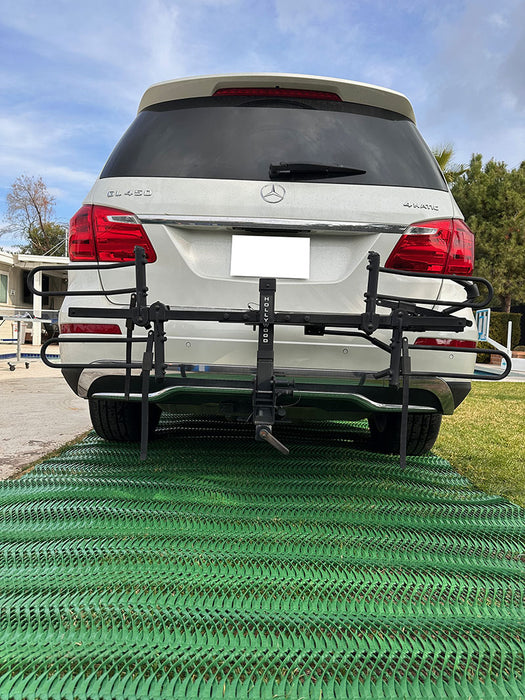
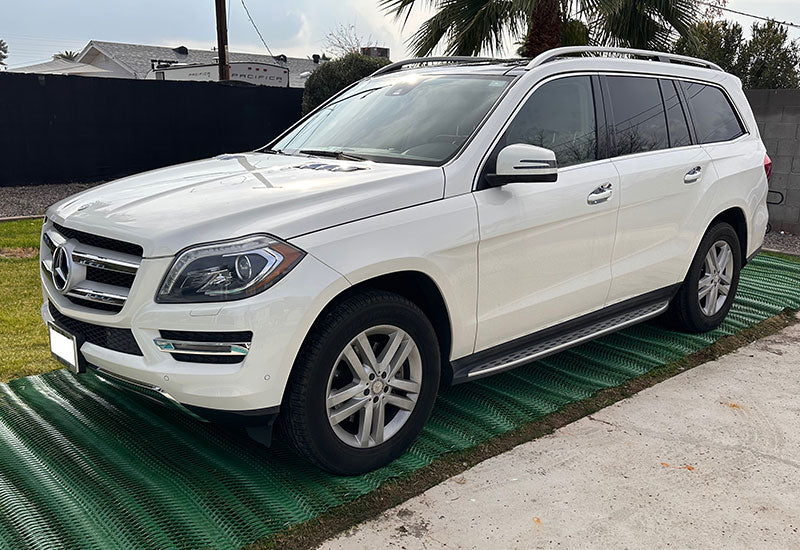
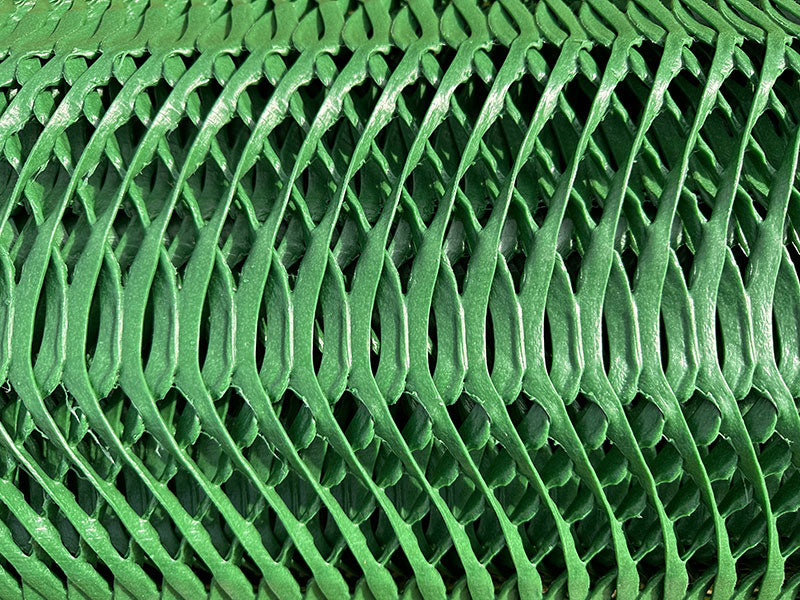
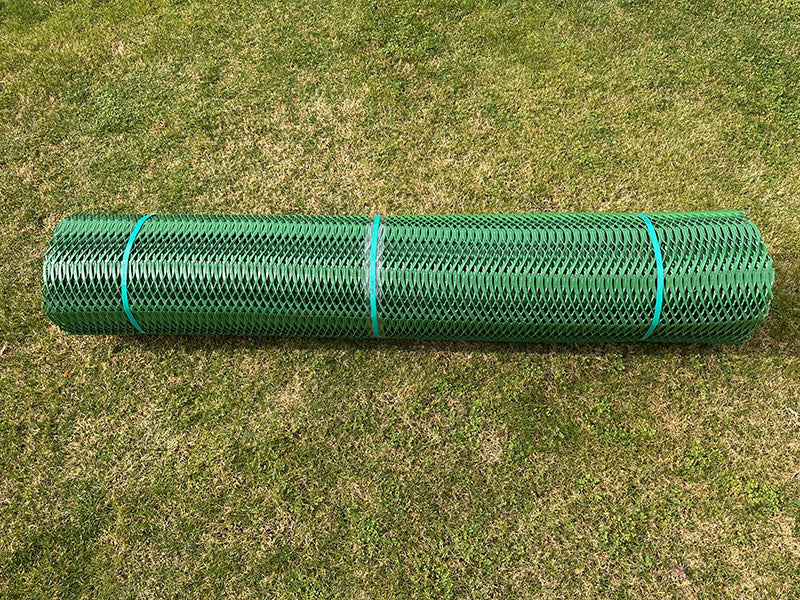
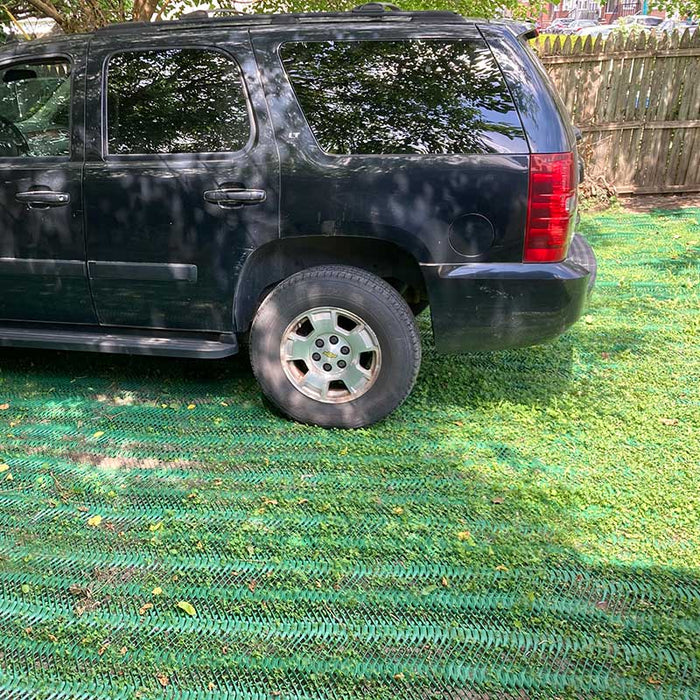
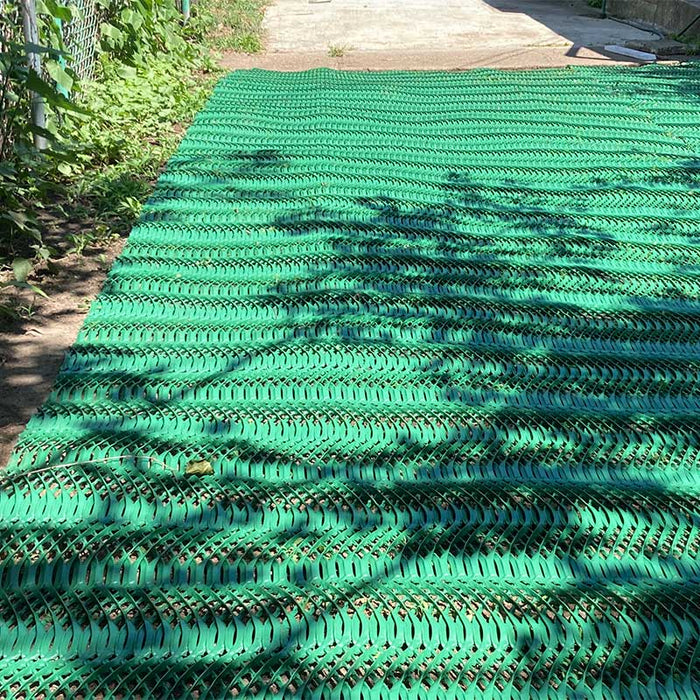
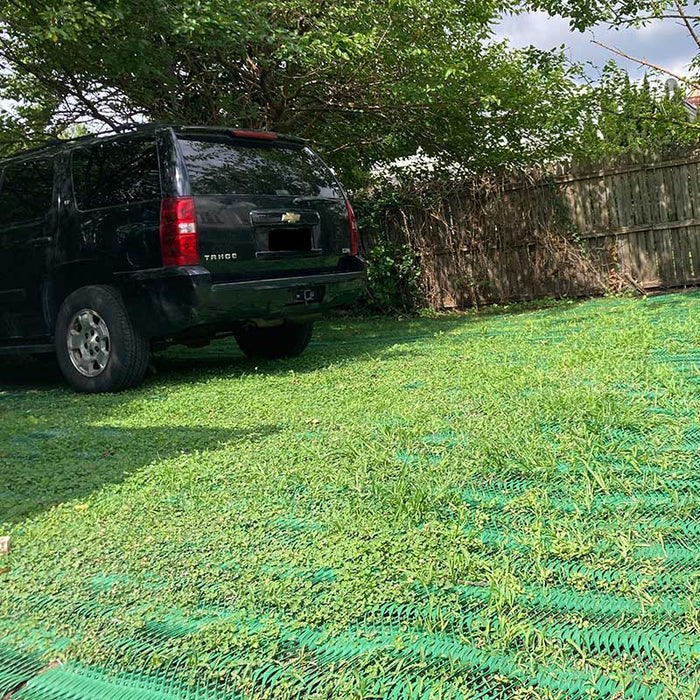
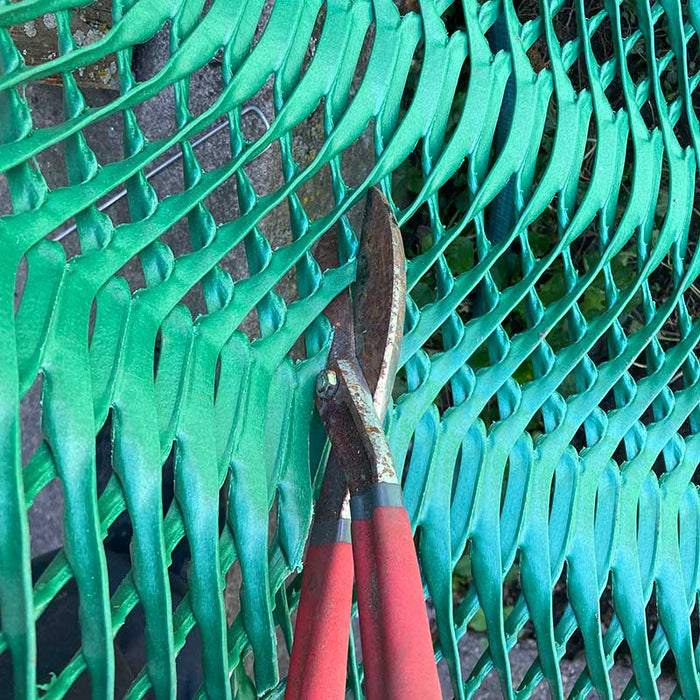
Designed specifically for turf protection our HDPE extruded-designed plastic Lawn Mat is the solution for most customer's turf protection issues. Whether you deal with rutting from vehicles, or sunken footprints from walkways we have a turf protection grid that can help.

The Lawn Mat is made in America and can be easily installed and used for dog runs, residential parking, RV parking and more.

Size: 6.7' x 25' (167.5 SF)
Roll Weight: 60 lbs

MudStop HG™
At a Glance

  • Manufactured in the USA
  • Built-In UV Stabilization
  • Promotes Healthy Grass Growth
  • Reduces Mud
  • Quick Installation
  • Made with Recyclable Materials

MudStop™ HG
Heavy-Grade Grass Protection Mesh

Download Product Specification Sheet
  • Roll Size: 6.7' x 25'
  • Square Feet Per Roll: 167.5
  • Roll Weight: 60 lbs

HG

Heavy-Grade

Our grass protection mesh is designed for demanding applications. The osculated mesh pattern provides a high degree of strength which is required to support the weight of a vehicle. Our mesh is ASTM lab tested to ensure strength and durability.

Request Formal Quote

Do you require a formal quote for MudStop™ HG? Fill out the form at the link below and we will provide you with a written quote within two business days.

Request Formal Quote

Questions?

Do you have product related or purchasing questions? We are happy to help, feel free to contact us.

Ground Staples

Each Roll of MudStop™ HG requires 100 ground staples for proper installation. (sold separately)

Ground Staples - 100 Staple Carton

MudStop™ HG Calculator

How many rolls of MudStop™ HG do you need for your project? Just enter your square footage below:

"I Love the Heavy Duty Quality"

“Absolutely the best, least costly and less work solution to a turn a grassy area into an extra parking spot. I love the heavy duty quality and the way the green material looks. One $600 roll did the job with no digging/prepping needed. The alternative would’ve been $4300 for cement conversion or $2300 for gravel. The best part of it all: No permits required and can easily be converted back to just grass in the future.”

- Victor, Philadelphia, PA

Easy to Work With 25-foot Roll Size

Most heavy-duty grass protection mesh on the market is shipped in large 50’-70’ rolls which are very large, heavy and difficult to handle. When developing MudStop™ HG we kept this in mind and decided to produce 25’ rolls which are much easier to handle and work with. A roll of MudStop™ HG weighs 60 lbs and can be picked up and moved by one person instead of two. Additionally, due to the reduced roll length, smaller projects can be accomplished without having to purchase a bunch of extra material.

MudStop-roll.jpg__PID:d2eae9a3-ca81-4b0e-96cc-c560816fd8c4
Mudstop-roll-2.jpg__PID:d8c4898c-ebf9-49dc-9a03-afd1179e79b0

MudStop™ HG vs Economy-Grade Mesh

Low priced economy-grade mesh can provide basic reinforcement for very occasional vehicular parking. Where issues arise are in material durability and reduced traction. Due to its low strength, economy-grade mesh quickly deforms when driven on and will begin to rut out the grass underneath. Additionally, the low priced mesh is typically a flat mesh without ridges. This can create a slippery surface for pedestrians and vehicles when wet. MudStop™ HG incorporates an osculated mesh pattern to provide greatly enhanced material strength while its multi-layer design enables enhanced traction for both vehicles and pedestrians.

Where Can MudStop™ HG be Installed?

MudStop™ HG grass protection mesh can be installed in a wide variety of different landscape applications - pretty much anywhere you want protection against rutting from tires or foot traffic!

Residential Parking Areas

GPM-1.jpg__PID:bbf8b96c-3c1b-4431-a964-bc47325a9466

Commercial Parking Areas

T5.jpg__PID:3081d8ac-8348-437d-af47-be99e34e1a5b

Vehicle Access Roads

T4.jpg__PID:2818c798-5489-467e-b6c0-ec77b7e1bd9e

Golf Cart & ATV Pathways

T3.jpg__PID:bd9eefc5-91d0-4718-b5fc-064df26f0e70

RV, Trailer or Boat Storage Lanes

T6.jpg__PID:0e701d9f-4b66-46b9-a15d-9528e8622e1e

Overflow Event Parking

T1.jpg__PID:2e1ebe5a-7c61-46c7-8d98-aa7db8505c65

Pedestrian Walkway Areas

T2.jpg__PID:5c65ac6a-dab9-438b-902c-fc159d8bec82
dog-running-on-grass-protection-mesh.jpg__PID:fb43ede6-318c-45eb-860e-708b72a256f8
dog-paws-turf-reinforcement-mesh.jpg__PID:9249befa-2ea2-4d87-80e5-a5ced6e4fb43
dog-grass-protection-mesh.jpg__PID:8f0ae220-49e3-428f-987a-ee58dab8bfca

Great for Dog Runs Too!

In addition to protecting grass from vehicular damage, MudStop™ HG can also be used to protect grass from becoming damaged in dog run areas. The osculated mesh pattern is engineered with small openings which keeps paws from getting stuck. Does your dog love to dig in your lawn? Our mesh will prevent that from happening as well. MudStop™ HG is the perfect solution to keep your lawn mud free and your dog with a safe place to run and play.

3-Step Easy-Installation

The installation of MudStop™ HG in a lawn area can easily be accomplished by the homeowner. Follow the simple 3-step process below to reinforce your lawn with MudStop™ HG for optimal protection of your lawn area:

Step 1:
Cut the Grass Short:

GPM-Step-0.jpg__PID:c001bd93-e694-4775-bc7a-11dbf3fba43d

First cut the grass area short so that the mesh can be applied as close to the root zone as possible. 

Step 2:
Roll out the Mesh:

GPM-Step-1.jpg__PID:a43dd856-61f3-4a1c-8833-35917fd2e62c

Roll out the mesh on the grass’s surface. 

Step 3:
Attach Using Ground Staples:

GPM-Step-2.jpg__PID:e62c99d2-948e-4d8d-b35a-2a68b9d6008a

Using 8" ground staples, affix the mesh to the ground’s surface placing 1 staple every 18 inches in all directions. (each 25' roll of MudStop™ HG requires approximately 100 staples) As a general rule of thumb, the more staples you use the more secure the mesh will be. Edges and seams may require additional staples depending on the installation site characteristics. While stapling, be sure to smooth out any bumps or bubbles in the mesh caused by an uneven grass surface.

You're Done,
Park Your Vehicle!

parked-MudStop-2.jpg__PID:e4972e7b-81aa-4909-bc70-ab4a4d0445b2

You can now drive, park and walk on your reinforced lawn. Be sure to water the grass well to encourage appropriate grass growth through the mesh. This will help disguise the material and provide a more natural looking surface.

Parking an RV or Boat?

If you are parking an rv, boat or other heavy vehicle long-term on the mesh it is a good idea to double up the mesh where the wheels will directly rest. Over time a very heavy load concentrated on a single area can deform the mesh especially during heavy rainfall if the ground below becomes saturated. Adding a second layer of mesh will provide additional support and help to prevent indentation into your lawn from the vehicle tires.The best way to accomplish this is to install a 1-1/2’ square under the main mesh layer where each tire will rest.

How Long Will Shipping Take?

MudStop™ HG is stocked and ships from our Kansas City distribution center. Orders typically ship within one business day. Shipping is free and most customers experience delivery within one week of order placement.

Transit Time

MudStop™ HG orders typically ship within one business day of order placement. Smaller orders of a couple rolls typically ship via UPS / Fedex while larger orders ship by LTL freight. If your order ship via LTL freight the delivery company will contact you prior to delivery to arrange a delivery window that works with your schedule.

shipping-map-c.gif__PID:a1d7b040-17b5-4225-ad55-d824eb952374

Transit times on the map above are shown in business days and exclude weekends and holidays.

Learn How And When To Install A New Lawn

Although lawns were around centuries ago, they have become a symbol of well-kept homes. Even though many people are concerned about the environment, lawns have remained a very important part of our culture and overall landscape. Lawns are an important part of a home's appearance.

Keeping a lawn in great shape can be hard work. Due to severe climates, abnormal rainfall, droughts, and numerous pests, many yards and lawns have fallen into neglect. But with some hard work and time, you can turn your shabby lawn into something fantastic! In this article, we will cover all the bases to help you create a lawn that will be admired and will add value to your home.

In many cases, lawns suffer from poor soil compaction, out-of-control weeds, or other natural deficiencies. If your lawn has become ragged, this might be the perfect time to start over. Even though it will take hard work, in the long run, it will last for a very long time. Many homeowners will choose to go with seeding while the alternative is laying down carpet sheets of grass which are normally 1-1/2 ft wide by 6 ft long.

Rolling out Sod

Installing Sod in Backyard

Seeding Vs Sodding

Seeding is a lot less expensive and requires a lot less work than laying down sod, but a seeded lawn will need a lot of care and there are only certain times during the year when you can lay down seed. In most areas, the best time to seed cool-season grass, like Kentucky Bluegrass, Ryegrass, or Fescues is in the fall when the upper soil temperature is between 68° F and 86° F. This is when new turf can establish roots while plant growth is vigorous and the onslaught of weeds is very low before winter hits.

In the South, it's highly recommended you seed in the spring and summer for warm-season grass including Bahia grass, centipede grass, buffalo grass, and carpet grass. The upper soil should be between 68° to 95° F. Always check with your local Cooperative Extension Service for recommendations in your area.

Sod takes more skill and knowledge to plant but does have some advantages over seed. It will look great very quickly and can be used much sooner than seeded lawns. Sod is better for sloped terrains where seed would only wash away after a hard storm, Sod is less vulnerable to erosion while establishing and it's much harder for weeds to take control over it.

In the North, sodding should be done in the spring or fall while sodding should be done in the spring in the South. Planting sod in warm weather will run the risk of burnout. Do Not plant sod after a month before the first fall frost. It needs time to establish roots before the cold weather hits.

Make Preparations

Making preparations can actually be the hardest part of sodding. If you are planning on a large lawn, you might want to do it in sections. You should start by taking care of the worst areas that are probably quite visible. You can always do other areas later on in the following year. This will help you manage the project and watering will be easier to do, especially if you do not have a sprinkler system.

If you do not know how to kill and remove the old lawn, there are several options. You can use a herbicide or use various equipment. In most cases, equipment is easier and the best way to tackle it because herbicides can harm your kids and pets. For larger lawns, you might consider renting out a sod cutter. It will cut under the grass so you can easily pull up strips of turf. The best time is when the lawn soil is still wet or moist.

For smaller lawns, a grape hoe often called a grub hoe is a great tool. If you are strong or have someone to help you get rid of chunks of turf, you can remove up to 300 sq. ft in an hour.

Once you are finished removing weeds and grass, you should contact your Cooperative Extension Service and get the soil tested. They will let you know where to send the sample. Once the soil is tested, they can give you recommendations regarding the modifications for the soil to help your new lawn. While waiting for the results, you could address existing grade issues.

The first step for grading, make sure the ground slopes away from your home in all directions and drops at least 2 or 3 inches for every 10 feet. The finished grade should be level with other installations in your yard such as walkways, patios, as well as areas that will not be replanted. When replanting seed, the grade should be one inch lower than other fixtures in the yard. If you are adding sod, the grade should be 2 inches lower than the other installations such as the walkway.

Removing old turf, grade the entire area with a wide landscaping rake. If you plan to add other improvements, you should go by the recommendations given to you from the soil test results. Be sure to till the soil at a depth of 6 inches. To create a firm surface for sod or seed, roll the area with a lawn roller that is approximately 1/3 filled with water. Continue rolling until you can walk on the surface.

Create your own turf-cutting tool by sharpening the edges of a mason's trowel with a metal file. To regrade an area, remove the topsoil from the area. Make adjustments to the subsoil by scraping down high areas and filling in low areas. Spread out 2 inches of saved topsoil over the subsoil then till the first 2 inches of the subsoil. It can prevent drainage issues between the two layers of soil. Lastly, spread the rest of the topsoil another 4 inches. Use a landscaping rake to work the topsoil to the correct grade. At this time, you can add fertilizer, organic matter, and lime or sulfur. Make sure the improvements are in accordance with the results from your soil test. Be sure the added materials are spread evenly then till to the top 6 inches of soil. Rake until the area is smooth. Remove any stones and vegetation on the surface during tilling. Once you are pleased with the results, water the ground and check for puddles. Once the soil is dry enough to be worked, move the soil from the higher spots to the lower spots. Roll the prepared soil, whether for seeding or sodding, to form a firm base. If seeds are planted too deeply, the plants could die before they make it to the surface.

Fill your lawn roller around 1/3 full with water and roll it until your footprints on that area are only ½ inch deep. To finish the preparations, water deeply for two days before planting.

Laying Sod

Before you start, apply a starter fertilizer that is high in phosphorus, and then lightly water the area. You should be ready to get to work once the sod is delivered otherwise the sod could heat up or dry out. Tip - have the order delivered to a shady area and be prepared to install the sod in one day. If you are new at this, you might want to lay soil in one area at a time.

Lay full strips around the perimeter of your working area. If you have irregular borders, lay the sod and cut off the excess later on. Start from the lowest point toward your home laying the strips in a staggered fashion and cutting the ends so they will butt tightly against the perimeter strips. You need to trim excessive sod off using a sharp utility knife or a small-sized mason's trowel. For the best results, make a square cut and move the trowel straight up and down.

Watering Sod Rolls

Watering Rolls of Sod Grass

Water each piece of sod after it has been installed. After each piece has been completely soaked, fit two pieces of sod together at an angle. Lay one piece over the other and cut both at the same time. Lift the top one and remove the waste below. When you go to the opposite side of your work area, add a row of sod next to your perimeter pieces. Roll out the next section which is almost the last row and cut the pieces to fit. Discard the waste or use it somewhere else to fill in gaps. Using your edging tool to trim curved edges or areas where the sod runs into other obstacles. Use your sharpened trowel to cut off excess soil where the pieces meet. Cut straight up and down for the best results.

You can also use your trowel to level small bumps and fill in depressions. After each piece of sod has been laid, soak it with water then move on to the next one. Using a straight board as a guide, make the last cut then discard the waste or use it to fill a gap.

Trim the curved edges where the sod sits by planting beds or other obstructions in the lawn with an edging tool. If you are working on a slope, place the sod at the lowest spot then work your way up. Stake each piece in three places to make sure there is no slipping. Use stakes that are approximately the size of a painter's stir stick. Then roll the sod with a 60 to 75-pound roller. When you are done, fill in any small gaps with fine soil. Finally, you must soak the soil around 6 to 8 inches deep.

Plant Seed

Administer a starter fertilizer with a ratio of 1:1:1 or 1:2:1 (nitrogen, phosphorus, and potassium) to the surface but do not till. Spread the seeds you have at the rate recommended by the seed grower. The rates are usually in pounds per 1,000 sq ft. Perform a light raking to work the seeds into the topsoil at ½ inches.

Lightly roll with an empty roller for good contact between the seeds and the soil. Hopefully, you planned your watering requirements. Insufficient watering can lead to your lawn failing and too much water is not good either.

For sprinkler should be set to mist your newly seeded lawn surface 4 times a day starting at 7 am up to 6 pm.

At a depth of 1 to 2 inches, the seedbed should be moist but not soaked. The sod should be watered twice a day including one at midday. Once the sod has started new root growth, reduce watering to every second or third day for at least 2 weeks. once four weeks have passed, your lawn should be able to carry on for longer periods of time without water.

If the weather is warm or dry, spread a layer of straw. Choose clean mulching straw (such as wheat straw) and spread it at a rate of 50 to 80 pounds per 1,000 sq. ft. You can remove the mulch after germination. You can start mowing after the seeded lawn has grown to a height of 3 or 4 inches. You should mow with a reel mower but if you don't have one, use a rotary mower with the throttle set low. The first time, just remove between ½ to ¾ inch. The next time you mow, cut the maximum height recommended for your variety of grass but not more than 30% leaf length per mowing. Do not mow a sodded lawn for 10 days after installation and until the grass has started growing.

Cut back on foot traffic or other activities for at last 3 weeks. Do not apply fertilizer to new lawns for at least six weeks then apply a light fertilization of ½ pound of nitrogen per 1,000sq. ft.

Watering is critical for your lawn even after it appears established. Water twice a week in hot, dry weather and keep it up for 2 years. You want to ensure the soil is moist to the depth of its roots. If you stop watering during this time, you might discover you will have to start over by planting your lawn again.

Installing Grass Sod

Placing Down Sod

Highlighting

Once the sod has been installed roll the area with a 60 to 75-pound roller to get rid of air pockets underneath. After you have completed this step,, fill in any gaps you found with fine soil then rake the surface until it's level with the sod. After the seeds are spread work them into the top ½ inch of topsoil using a garden or leaf rake.

Spread mulch straw over the seeds to slow down water evaporation and offer shade for the plants as they start to grow. We have gone over the steps and requirements for starting a new lawn. No one said it would be easy, but if you follow the steps and directions, you should welcome in a new lawn.

In Conclusion

Deciding to start over with a new lawn will take a lot of work and time but in the end, it will be well worth it when you enjoy your new, lush, vibrant yard!